|
|
|
|
| Place mouse over 'Training' menu above to display extra options |
| Page Location: Home > Training > Information Sheets > #11 Replacing a ScreenFax Pad |
|
|
|
|
| Place mouse over 'Training' menu above to display extra options |
| Page Location: Home > Training > Information Sheets > #11 Replacing a ScreenFax Pad |
|
|
|||
|
|
|||
|
|||
|
|
 Replacing
a ScreenFax Pad
Replacing
a ScreenFax Pad
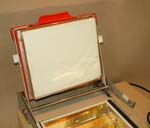
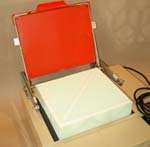
This document refers to replacement of the original ScreenFax Pad using an aftermarket replacement foam. This example uses the SP-275 ScreenFax model, however information is applicable to all ScreenFax systems.
Important note on replacement foam
Replacement foam is a high density 50mm foam which is thicker than the original
ScreenFax Pad [supplied fitted to the machine when new].
Originally manufactured in Japan, the original very high density material is no
longer manufactured. Using a foam that is too thin will result in incorrect
exposure of screens, may cause premature exposure of the machine and greatly
increase the instance of pinholes in the screens.
 |
Step 1 Open the bag and remove the contents - Instructions, Pad & Stickers - place to one side. HINT: Use the replacement pad’s bag as the waste bag for the old pad |
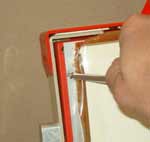 |
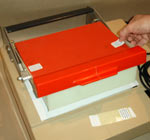
Step 2 Lift the lid of the machine. Using a phillips head screwdriver remove all the screws holding the existing backing plate [if fitted] to the lid of the machine. Screws are normally located at the sides & bottom - on some SP-275 models the screws may be partly covered by the pad, simply clear foam around the screw and remove. |
 |
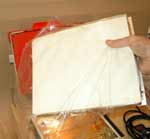
Step 3 Lay the replacement pad on the stage glass and remove the double sided tape from the back, placing waste strips into the bag with the old pad. When removing the double sided tape use caution not to rip the replacement foam - if the tape is stuck try the other end or middle of the strip. |
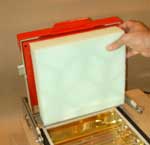 |
Step 4 With the tape removed, centre the pad horizontally between the edges of the lid and carefully place the top edge of the foam against the top edge of the lid. The foam is designed to sit flush along the top edge. |
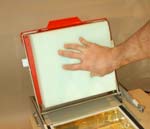 |
Step 5 Let the remainder of the foam lower and fall against the lid. Push against the pad lightly to ensure the remainder of the pad adheres to the lid as pictured left. |
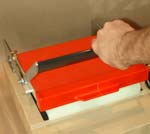 |
Step 6 To firm the Pad against the lid, lower the handle of the machine and press down - as you would to create a screen. |
 Your
replacement pad is now installed & ready for use.
Your
replacement pad is now installed & ready for use.
Post-install usage notes
Under initial use the pad may present a rubber or slight burning smell generated
by the heat from the Xenon lamps. This will settle as the pad receives more use.
This is normal operation and there is no risk of melting, fire or damage to the
pad - even when used repeatedly on the highest setting.
 Labelling
the Lid
Labelling
the Lid
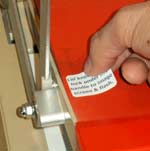
As the new foam is a thicker material, in some models the lid pegs must be
forced under the handle until the Pad settles. Reminder stickers are provided
and it’s recommended you place them on the lid of the machine to ensure each
operator is aware of this operation.
Faliure to place the handle over the Pegs when imaging will result in the
machine not operating.