|
|
|
|
| Place mouse over 'Training' menu above to display extra options |
| Page Location: Home > Training > Information Sheets > #30 - Registering single colour designs using a jig |
|
|
|
|
| Place mouse over 'Training' menu above to display extra options |
| Page Location: Home > Training > Information Sheets > #30 - Registering single colour designs using a jig |
|
|
|||
|
|
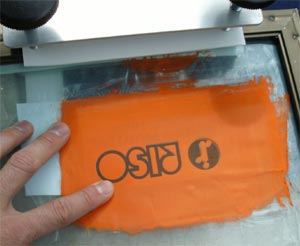
In this example we are going to print a logo onto a mouse mat as this requires a few more steps than a t-shirt, which is simply pulled over the board on the jig.
Important note before you begin
The location of your design may play an important part on how you layout and create your screens. The reach of a jig's arm combined with the frame size you use is important.
 Pictured
right is a screen where the image is too low and the arm can not travel
any further to reach the design area. This problem is caused by fitting
a design to a frame that is too small for the outreaching areas of the
jig.
Pictured
right is a screen where the image is too low and the arm can not travel
any further to reach the design area. This problem is caused by fitting
a design to a frame that is too small for the outreaching areas of the
jig.
By laying out your design & frames on top of the item in your jig before you begin to print you will avoid this problem.
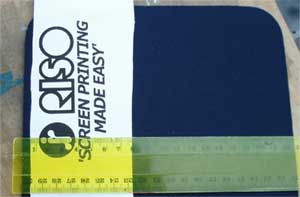 |
Use a ruler, as pictured left, to ensure the design is straight. Once in place adhere the artwork onto the item with masking tape so it can not move. |
|
Hint |
|
| When registering a design onto a t-shirt, slip the t-shirt over the board just like you would for printing and register the design. Then remove the t-shirt with the designs adhered and actually put it on and look in a mirror or have someone else look at the design to check level. |
 Step
2
Step
2For T-shirts: Pull the t-shirt onto the board with the artwork attached - this is all you need to do! Proceed to step 3.
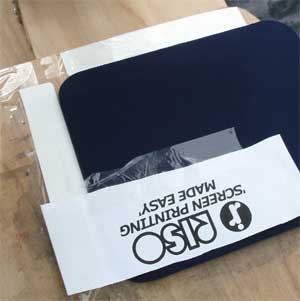
For flat items [as per example]: To ensure the item is placed in the same position each time, we need to create corner/ side registration points on the board that the item will slot up against.
In this instance we have used 2 pieces of plastic [from the S-9112 Plastic Height Adjusters for Jigs] along the bottom & side edges - as pictured left.
The registration points should be firm [not paper] so they do not move during printing and should ALWAYS be lower than the item to be printed, or the screen will be kept raised on the edge and not travel to print the item.
Tape the registration points onto place to make firm.
|
Note |
| Jigs differ in operation between models and functions - the following is based on the NEHOC Single & 4 Arm Screen Printing Jigs. If your jig does not have adjustable arms then you may be required to move your item to a different location on the board before fine tuning the registration in the arm [this applies when using Jig Hinges]. |
 Step
3
Step
3To register the first step is to loosen all the parts of the jig for easy movement.
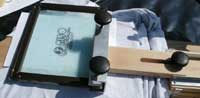
Place your screen into the jig and move the long arm out and when in place lock in.
Now you can fine tune the registration by moving the screen over the item as pictured. When in place tighten the arm to lock the screen in place.
|
Hint |
|
If you are required to print 'off
contact' then insert the plastic raisers under the frame
in the screen now before registration. When using the NEHOC Single & 4 Arm Jigs, place a piece of plastic between the frame and the tightening screw - this helps stop movement of the frame when tightening. |
Lift the arm of the jig then lower it again to check registration.
You can also remove the item from the board and reinsert against your registration points, then lower the arm to check again.
You are now ready to begin printing.