|
|
|
|
| Place mouse over 'Training' menu above to display extra options |
| Page Location: Home > Training > Information Sheets > #40 Imaging screens using a NEHOC A3 thermal Screen Maker |
|
|
|
|
| Place mouse over 'Training' menu above to display extra options |
| Page Location: Home > Training > Information Sheets > #40 Imaging screens using a NEHOC A3 thermal Screen Maker |
|
|
|||
|
|
|||
|
|
|||
|
|
Imaging RISO ScreenMaster using a NEHOC A3 Thermal Screen Maker
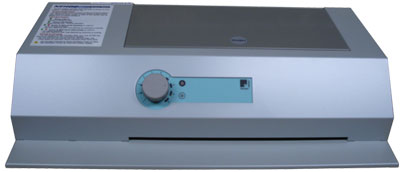
In order to keep the RISO ScreenMaster original artwork together, it is necessary to utilise a carrier to facilitate passage of the materials through the machine.
NEHOC supply a high grade carrier, in A4 and A3 size, which uses a high temp. joining tape and FEP100 Teflon Cover Sheet to provide high resolution imaging.
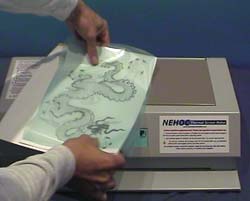 | Step 1 Artwork can be hand drawn, photocopied or a computer laser print - as long as it’s carbon based it will work. For details on artwork types - click here . .
|
 | Step 2 Lift the clear cover of the carrier and place your artwork 'face up' inside the carrier. With your ScreenMaster cut to size, place over your artwork with the film side [smooth] down against your artwork. |
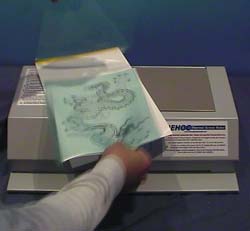
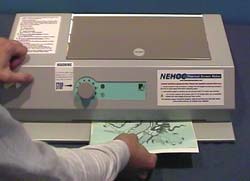
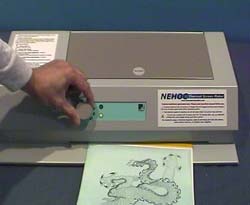 | Step 3 Turn the machine on and set to the to the required setting [5 is normally used for photocopies/ laser prints] and feed the carrier into the front of the machine in a continuous motion. |
 | Step 4
The carrier will be passed through the machine and fed out the back
of the machine.
|
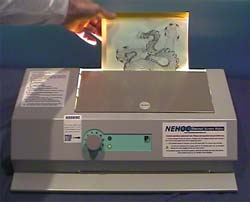 | Step 5 Support the carrier as it comes out the back of the machine. Do not pull it through the machine, just support it's weight as it comes out the back. |
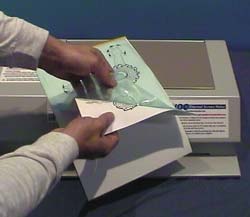 | Step 6 Lift the cover and remove your imaged screen from the carrier. As pictured left, the screen has now been imaged. Check a corner to see the screen has been imaged correctly [you may need to adjust your setting if required].
|
With your screen now imaged you are ready to mount your screen to a frame and commence printing.