|
|
|
|
| Place mouse over 'Training' menu above to display extra options |
| Page Location: Home > Training > Information Sheets > #32 Printing Plastics using PRINT GOCCO Print Masters |
|
|
|
|
| Place mouse over 'Training' menu above to display extra options |
| Page Location: Home > Training > Information Sheets > #32 Printing Plastics using PRINT GOCCO Print Masters |
Printing Plastics using B6 & B5 Print Masters
Plastics & metals are a non-absorbent material, so when we print them the ink
sits on top of the item and then cures/ bonds as it dries, unlike fabric inks
which are absorbed. To achieve a professional results we must do 3 things
differntly:
1. A finer grade of screen should be used
2. The screen must be elevated above the item and printed ‘off contact’
3. Aqua ink for plastics must be used
 Non-absorbent
materials do not soak up any ink so the standard 70Mesh, used for fabrics/
ceramics, leaves a ‘mesh mark’ - this is the pattern left by the strands of
the mesh on the surface of the item as the ink can not soak in behind it.
Pictured left is an example of ‘mesh mark’ viewed at 250%.
Non-absorbent
materials do not soak up any ink so the standard 70Mesh, used for fabrics/
ceramics, leaves a ‘mesh mark’ - this is the pattern left by the strands of
the mesh on the surface of the item as the ink can not soak in behind it.
Pictured left is an example of ‘mesh mark’ viewed at 250%.Materials Required
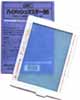 Using
B6 Print Masters [code: S-489]
Using
B6 Print Masters [code: S-489]
1. Imaging system [NEHOC Screen Printing, Ceramic Printing Kit or
PRINT GOCCO PG-5, PG-11, PG Arts, B6, B5, etc.],
2. 3 x Small Plastic Frame Mounts [code: S-9100]
3. 110mm Long Life Squeegee [code: S-510]
4. Aqua Ink for Plastics/ Metals
[details]
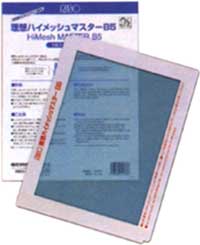 Using
B5 Print Masters [code: S-180]
Using
B5 Print Masters [code: S-180]
1. Imaging system - PRINT GOCCO PG Arts for Paper or B5 model
- Smaller PRINT GOCCO models [PG-5, PG-11, & B6] may be used to image the screen as printing is performed outside the machine - imaging is performed in 2 stages as per a larger A4 screen printing screen [details for this process are on Information Sheet #05]
2. 5 x Large Plastic Frames [code: S-9101]
3. 170mm Long Life Squeegee [code: S-517]
4. Aqua Ink for Plastics/ Metals [details]
Step 1 - Imaging your Print Master/Screen
Prepare your artwork for imaging by eliminating any moisture and excess carbon from the design. Use the Artwork Clean-Up Process before imaging your artwork.
Imaging your Print Master for screen printing is exactly the same as for Paper/ Card printing - instructions are detailed in your Operation Manual or on separate Information Sheets in the TRAINING section of the site.
Step 2 - Mounting your Print Master to a Frame
 After imaging your design onto your Print Master, remove it from the machine.
Prepare the plastic frame by remove the protective coating of the double sided tape along the two long edges of the plastic frame. Leave the tape on the two short edges of the plastic frame.
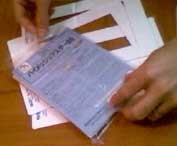
Tear the plastic flap from the Print Master, as pictured right, as this is not used when screen printing with the Print Master.
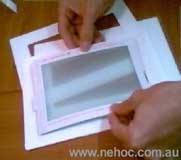
Place your Print Master onto the plastic frame with film side in contact with the double sided tape - cardboard facing upwards, pictured left.
Your Print Master is now attached to the plastic frame by the long sides of the frame. You will note the Print Master is slightly shorter than the frame - this is why we leave the double sided tape on the short sides.
Step 3 - Elevating the screen for 'off contact' printing
As the screen must be elevated for printing, the printable area of the screen decreases the higher we elevate - we cant print right to the very edges without tearing the screen!
As we are using B6 and B5 Print Masters the maximum size we can print is almost the same each time.
A B6 Print Master [100x150mm] elevated with 3 frames give us 50mm x 90mm print size
A B5 Print Master [165x235mm] elevated with 4 frames give us 110mm x 150mm print size
The B5 Print Master is elevated slightly higher as the larger the screen size the higher we need to elevate to stop the middle of the design ‘sticking’ when printed.
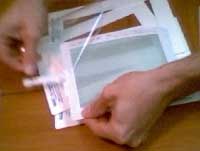
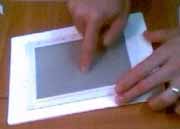 Place the additional plastic frames under the attached screen and test the height, pictured right. We are trying to elevate the screen as high as possible above the item BEFORE the edges are not able to touch the item below.
How hard should you press to test? You should be able to gently press down over the design area with your finger and the screen will come in contact with the item.
If you are pressing too hard you may stretch/ tear the screen. There is no need for hard pressure - use the squeegee if you are unsure and simply perform a dry print [instead of using your finger to test].
If the edges do not come in contact with the item below then remove a plastic frame.
If the edges easily touch the item add another frame and re-test
Remember, you can always increase/ decrease the height of the screen after you begin printing, as you use the straight edges of the frames for your registration [covered below] so changing height is fast & easy.
Step 4 - Printing your design
By now you should have the Plastic Frames and Print Master stuck together and set to the correct height for printing.
The actual printing process is the same as for screen printing plastics, excepting you must use Aqua Ink for plastics. Do not use extra pressure on the squeegee when printing - the screen will naturally lower to the item when printing.
The final step is to register the print over the item, this best done using a Screen Printing Jig or set of Jig Hinges [code: S-360H].