|
|
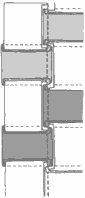
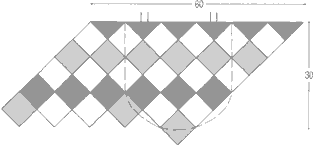
- Step
2
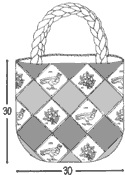
- Sew squares into strips, as shown left, with 1 Red,
1 White Print #1, 1 Red Spot, 1 White Print #2.
- You can also vary the pattern buy changing the
order e.g.: 1 Red, 1 White Print #1, 1 Red Spot, 1 White Print #2, 1 Red,
1 Red Spot, etc.
|
 |
- Step 3
- Sew the single strips together to create double
width strips as shown left.
- Lightly iron the strips once finished to flatten
and prepare for next stage.
|
|
|
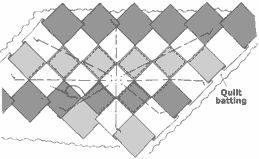
- Step 4
- As shown in the diagram left, place the finished
patchwork over the quilt batting, and tack it from the centre outwards,
quilting the areas other than the base.
|
|
|
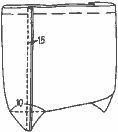
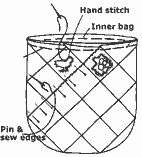
- Step 5
- Sew both edges of the inner bag, and sew triangular
guessets into the base.
|
|
|
- Step 6
- Fold the outer diagonally and place it over the
inner bag.
- Sew the edges together using tiny ladder stitches.
- Hand quilt around the printed areas using small
even stitches.
|
|
|
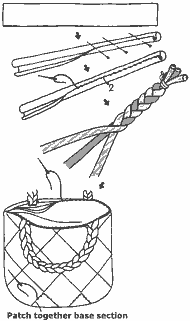
- Step 7
- Roll the material for the handles into tubes.
- Sew together and then triple braid them, making two
handles 40-42cm in length.
|
|
|
- Step 8
- Patch together the base section of the patchwork,
and finish off the quilting.
- Insert the carry handles into the openings and
finish off the inner bag.
|
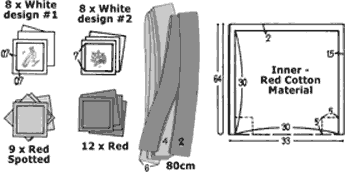
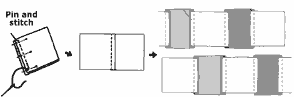
 Step
1
Step
1