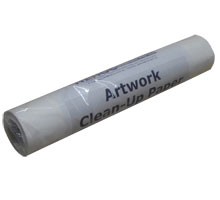
 Artwork Clean-Up paper
Product Code: S-155
The quality of your print is directly related to the quality of your artwork and how it is prepared for imaging.
Artwork Clean-Up Paper is used with all systems to prepare artwork before imaging, to eliminate the two most common problems that occur:
1. Moisture from the artwork - moisture sits inside the paper, under the carbon, causing the bond between the carbon and mesh to become greater than the bond between the carbon and paper when artwork is removed.
2. Excess carbon - sits on top of the design and will lift off to block the mesh when the artwork is removed.
Available Sizes
 |
30 Metre Roll Recommended size, supplied with all packages |
 |
Sample Roll Short Sample (75cm - 1M long) for testing and trials. |
- Product Home
- Specifications
- Accessories
- Support
Key Features
Eliminates moisture from the artwork
Elables large solidsto be imaged without dot screening or lowering carbon levels
Reduces excess carbon deposits
Usage
For this procedure you will require an iron set to permanent press - STEAM OFF, Artwork Clean-Up Paper [S-155] and a work area which is heat resistant.
Print Lamp Systems
You will require an iron set to permanent press - STEAM OFF, Artwork Clean-Up Paper and a work area which is heat resistant.
1. Set up your machine ready for imaging before you begin
2. Tear off a piece of clean up paper sufficient to cover the design area
3. Place the artwork face up on top of several sheets of paper or a surface that will not be affected by heat
4. Lay the clean up paper on top of the artwork
5. Place the DRY iron over the paper moving the iron from one side to the other, taking no more than 2 seconds to pass over the design
6. Repeat this process a further 3 times [4 passes in total] before lifting artwork and slowly peeling off the clean up paper.
Note: Do not heat for longer than 3 seconds per pass as this will overheat the carbon
7. On a NEW FRESH piece of clean-up paper repeat steps 5 and 6
8. On a third piece repeat steps 5 and 6. By this stage there should be a clear carbon image transferred onto the clean up paper. This is normal, if this is not occurring see ‘points to note’ below
9. On a fourth and final piece repeat steps 5 and 6. After this your artwork will be warm and paper noticeably crisp - you are now ready to immediately image your design.
Thermal-Copier Systems
1. Tear off a piece of clean up paper sufficient to cover the design area
2. Place your artwork face up in your Thermal Carrier and lay the clean up paper over the artwork. Ensure the clean up paper covers all the design or this will image to the front of your carrier.
3. Close the cover of your carrier and insert into the machine using the required clean up setting - details in your machines operation manual [general setting is 5-6]
4. Open the carrier and peel the clean up paper off the artwork - you can now image your screen.
NOTE: Some laser printers contain excess carbon and may require a 2nd pass, using a new piece of clean up paper, to remove the excess carbon before imaging.
Further usage details available in:
N8525 Screen Correction Manual
Cleaning
Clean-Up Paper is discarded immediately after use and does not require cleaning.
Store in a dry area.
Contents
Each.

 Specifications
HTAH165 - 165ml
Item Weight [Kg]: 0.185
Pack Length: 56mm
Pack Width: 56mm
Pack Height: 85mm
Cbm: 0.066 Kg
HTAH5L - 5 Litre
Item Weight [Kg]: 5.25
Pack Length: 180mm
Pack Width: 135mm
Pack Height: 285mm
Cbm: 1.731 Kg
Price and Availability
All prices are online in NEHOCdirect - select the 'Just Looking' option in Step 2.
SPJ-SK |
SPJ-M1 |
SPJ-4SK |
SPJ-M4 |
SPJ-M4B |
Ask a Question
Complete the Product Assistance Form for a quick reply to any question not answered in the FAQ's or training section - click here . . Select the product code listed at the top of this page.
FAQ's
What temperature do I set the press to?
Do I need to add water and/or use the steam option?
Why is steam coming from the design?
How long do I set for - when do I know the prints are set?
What happens if I don't set the inks for long enough?
Q) What temperature do I set the press to?
You must adjust the press to suite the type of fabric as overheating may cause burning of the fabric.
Cotton = cotton setting with Cotton/ polyester = poly setting
If unsure it's always best to start at a lower setting and test the first garment, you can always increase the setting slightly after you begin if the first prints are not heating the garment.
Never overheat the garment as this will cause burning to the fabric - it's better to set for 15-20 seconds with a short 5 second break and repeat a few times than try to set for 1 minute continuously.
![]()
Q) Do I need to add water and/or use the steam option?
No there is no need to use the steam option, the press will turn on and work normally without water.
As you are trying to eliminate the water based medium from the ink and dry the print out, steam will make this process very difficult.
![]()
Q) Why is steam coming from the design?
This is the water based medium heating up and coming out of the design as steam - this is normal.
Steam starts to appear once the design comes up to temperature, then starts to slow and disappear half way through the setting process.
If a print is completely dry (more than 5 days old) no steam may appear at all and will require setting for 30-40 seconds only. If a print is wet and no stream is present you will need to increase the temperature of the press.
![]()
Q) How long do I set for - when do I know the prints are set?
How long is a piece of string? Generally speaking, the first 20 seconds of the setting process brings the ink and garment up to temperature, the next 20 seconds eliminates the water based medium (steam rises), the next 20 seconds starts the pigment activation and setting of the ink.
- Large or solid designs will require a longer setting period as there is more volume of ink to activate and set.
A minimum of 1 minute is normally required for almost any print, increasing up to 3 minutes for wet prints.
As the actual timing varies on the design size, how long since it's been printed and the volume of ink in the design. A simple rule to start with is that when steam stops rising you are half way through the setting process.
e.g. If steam stops rising after 40 seconds (2 presses), your setting time is 1 minute 20 seconds (4 presses).
![]()
Q) What happens if I don't set the inks for long enough?
After 5 minutes the inks will not readily wash out of the garment and are starting to air dry. When washed, water will begin to attack the un activated pigments dilute the medium coating the fibres of the fabric. It's this removal of the pigments which causes the design to fade
Further washing will continue the fading process for up to 10 washes, where no more pigment can be removed
![]()
Page Information:
Level: Beginner to Advanced
< Previous: Artwork Accessories Homepage
> Next: Carbon Artowork Pens
Products: S-155 Artwork Clean-Up Paper (30M) and S-155-SAMP Artwork Clean-Up Paper Sample
Last modified: 28 October, 2009